Integrating Dear ImGui in a custom Vulkan renderer
In this post we’ll be looking at integrating Dear ImGui in a custom Vulkan renderer. The audience I’m targeting is beginners still struggling with Vulkan. You should however have a basic Vulkan renderer already up and running. I followed Alexander Overvoorde’s amazing tutorial myself and I will use it as an example. The code is entirely available at vulkan-tutorial (go to the bottom of the page) if you’re willing to start from there as well. The first chapters explain very carefully how to install the Vulkan SDK and deal with dependencies.
First contact
Ready for a deep dive into Dear ImGui? Good! First, let’s go to the official repository. In the readme, there is a bunch of information about the reasons why the library was created and what tasks it is suited for. You should already know about the latter if you’re interested in this library but the next lines are getting interesting:
Dear ImGui is self-contained within a few files that you can easily copy and compile into your application/engine:
-imgui.cpp
-imgui.h
-imgui_demo.cpp
-imgui_draw.cpp
-imgui_widgets.cpp
-imgui_internal.h
-imconfig.h(empty by default, user-editable)
-imstb_rectpack.h
-imstb_textedit.h
-imstb_truetype.h
No specific build process is required. You can add the .cpp files to your project or#includethem from an existing file.
 What’s important to note here? All the .cpp files must be added to the project. It seems to be a common mistake to forget some of those because I made it myself and immediately found a Stack Overflow post about it. I was convinced this was a header only library, turns out it’s not. So if you’re using Visual Studio you should add all the .cpp files listed above to your source files.
You will also need to include the header files. To do so, you can either include them using #include "my_path/my_file.h" or tell VisualStudio where they are and include them using #include <my_file.h>. The menu that allows you to do this is located at: Debug->Properties->C/C++->Additional Include Directories
Alright, let’s keep on reading. Next is a code sample that looks pretty easy to understand.
ImGui::Text("Hello, world %d", 123);
if (ImGui::Button("Save"))
{
    // do stuff
}
ImGui::InputText("string", buf, IM_ARRAYSIZE(buf));
ImGui::SliderFloat("float", &f, 0.0f, 1.0f);
So what then? Do I just include imgui.h, copy & paste this code sample and it all works through some kind of dark magic? That would be really cool but also not very flexible. To understand why this cannot work we need to understand what Dear ImGui is. First of all it’s an immediate mode GUI, which means the user is in control of the data not the GUI itself. This makes the GUI a little lower level than retained mode GUIs. However, as the author states, it’s important to separate immediate mode GUI from immediate mode rendering.
Immediate mode rendering (…) usually implies hammering your driver/GPU with a bunch of inefficient draw calls and state changes as the GUI functions are called. This is NOT what Dear ImGui does. Dear ImGui outputs vertex buffers and a small list of draw calls batches
This sentence is also interesting for another reason. It just gave us the core idea of what we need to do to be able to use Dear ImGui. We need to be able to use the vertex buffers it outputs and process the draw call batches. It definitely explains why we cannot simply copy and paste some code samples. We need to integrate Dear ImGui deeper in our engine to be able to handle its outputs. How do we do that? Well, the next section of the readme is all about it.
Integrating Dear ImGui within your custom engine is a matter of 1) wiring mouse/keyboard/gamepad inputs 2) uploading one texture to your GPU/render engine 3) providing a render function that can bind textures and render textured triangles. The examples/ folder is populated with applications doing just that.
Ok so everything we need to know should be in the example folder, good. You know where to go next. But before we do that, the author leaves us with a little taunt.
If you are an experienced programmer at ease with those concepts, it should take you about an hour to integrate Dear ImGui in your custom engine.
SPOILER: It took me more than an hour but I’m not an experienced programmer nor am I an expert at Vulkan and that’s ok! We’ll get through this at our own pace.
Reading more than the readme
Let’s open the example folder and see what we have. There are tons of things in there but only two folders about Vulkan: example_glfw_vulkan and example_sdl_vulkan. I don’t have any experience with SDL and the tutorial I followed used GLFW so we’re going to use example_glfw_vulkan for the rest of this post.
In this folder there are several build related files, Visual Studio files, shader code files and finally main.cpp. At the beginning of this file you will find some relevant information on how to setup Dear ImGui.
// dear imgui: standalone example application for Glfw + Vulkan
// If you are new to dear imgui, see examples/README.txt and documentation at the top of imgui.cpp.
Let’s start with examples/README.txt. It begins by reminding you that you will need to load the fonts to the GPU, pass the keyboard and mouse inputs to Dear ImGui, and provide it with a way to render triangles. Nothing new so far. The next bit holds more relevant information.
This folder contains two things:
- Example bindings for popular platforms/graphics API, which you can use as is or adapt for your own use.
They are theimgui_impl_XXXXfiles found in theexamples/folder.- Example applications (standalone, ready-to-build) using the aforementioned bindings.
They are the in theXXXX_example/sub-folders.
So basically this means that in the examples folder there are some actual example applications but also some kind of extensions to the core files. Those extensions can be used to integrate Dear ImGui in your engine more easily. We should be interested in the imgui_impl_vulkan files which are located in the examples folder. Reading a bit more, it looks like we’re going to need the imgui_impl_glfw files as well.
Most the example bindings are split in 2 parts:
- The “Platform” bindings, in charge of: mouse/keyboard/gamepad inputs, cursor shape, timing, windowing.
Examples: Windows (imgui_impl_win32.cpp), GLFW (imgui_impl_glfw.cpp), SDL2 (imgui_impl_sdl.cpp)- The “Renderer” bindings, in charge of: creating the main font texture, rendering imgui draw data.
Examples: DirectX11 (imgui_impl_dx11.cpp), GL3 (imgui_impl_opengl3.cpp), Vulkan (imgui_impl_vulkan.cpp)
Ok so now some of you might be thinking that they want to code everything themselves and that using the imgui_impl_vulkan files is cheating or whatever. Yes, sure. You can rewrite everything from scratch yourself. It’s probably the best approach in the end if you want to have control over your entire code base and make it all nice and uniform but as a first step, taking the easy way is probably for the best.
If you use your own engine, you may decide to use some of existing bindings and/or rewrite some using your own API. As a recommendation, if you are new to Dear ImGui, try using the existing binding as-is first, before moving on to rewrite some of the code. Although it is tempting to rewrite both of the
imgui_impl_xxxxfiles to fit under your coding style, consider that it is not necessary! In fact, if you are new to Dear ImGui, rewriting them will almost always be harder.
And I think that’s it for examples/README.txt. On to the next file, imgui.cpp. That one has a massive amount of information. In fact, the whole documentation of Dear ImGui is in there. I’m not going to take you through it step by step because there is too much to cover. It is especially interesting if you want to re-write the imgui_impl_xxxx files but we’re not doing that right now.
Ok back to where we came from, the main.cpp file from the example_glfw_vulkan folder. Now that we’ve briefly read the documentation we’re ready to understand what comes next.
// Important note to the reader who wish to integrate imgui_impl_vulkan.cpp/.h in their own engine/app.
// - Common ImGui_ImplVulkan_XXX functions and structures are used to interface with imgui_impl_vulkan.cpp/.h.
//   You will use those if you want to use this rendering back-end in your engine/app.
// - Helper ImGui_ImplVulkanH_XXX functions and structures are only used by this example (main.cpp) and by
//   the back-end itself (imgui_impl_vulkan.cpp), but should PROBABLY NOT be used by your own engine/app code.
// Read comments in imgui_impl_vulkan.h.
This is a very important piece of information. We’re being told that we should be mainly using the ImGui_ImplVulkan_XXX functions and structures and not the ImGui_ImplVulkanH_XXX ones. Why? Because those are Vulkan related helper functions and you should already have most of those in your engine.
Now that we know what we can salvage and what we must plug into our own custom engine, we’re ready to read the code itself.
Studying the code
At the beginning of the main.cpp file we see that we’ll obviously need to include imgui.h, imgui_impl_glfw.h and imgui_impl_vulkan.h. You can also see includes related to GLFW but you should already have those.
After that, there are a bunch of Vulkan related variables and functions declared. Those are the ones you should already have. Don’t worry too much about them for now, we’ll see later what your engine needs to expose to interface with Dear ImGui. For that, we’ll look directly at the main function.
Initializing Dear ImGui
The first block of code is about setting up a GLFW window, a Vulkan context, a surface and the main framebuffers. For this, some of the functions we skipped earlier are called. If you already have an up and running Vulkan application you have done this somewhere. Later on, we will need to expose some of the objects created in this phase like the GLFW window to interface Dear ImGui with your engine.
The next block is finally about some Dear ImGui specifics. Here we are creating a context for Dear ImGui, choosing the inputs we want to give it access to and a theme. These are functions from imgui.h only, there’s nothing Vulkan or GLFW related here.
// Setup Dear ImGui context
IMGUI_CHECKVERSION();
ImGui::CreateContext();
ImGuiIO& io = ImGui::GetIO(); (void)io;
//io.ConfigFlags |= ImGuiConfigFlags_NavEnableKeyboard;     // Enable Keyboard Controls
//io.ConfigFlags |= ImGuiConfigFlags_NavEnableGamepad;      // Enable Gamepad Controls

// Setup Dear ImGui style
ImGui::StyleColorsDark();
//ImGui::StyleColorsClassic();
Then comes the tricky part, exposing the relevant parts of your engine to Dear ImGui. This is mainly done through an interface called ImGui_ImplVulkan_InitInfo.
// Setup Platform/Renderer bindings
ImGui_ImplGlfw_InitForVulkan(window, true);
ImGui_ImplVulkan_InitInfo init_info = {};
init_info.Instance = g_Instance;
init_info.PhysicalDevice = g_PhysicalDevice;
init_info.Device = g_Device;
init_info.QueueFamily = g_QueueFamily;
init_info.Queue = g_Queue;
init_info.PipelineCache = g_PipelineCache;
init_info.DescriptorPool = g_DescriptorPool;
init_info.Allocator = g_Allocator;
init_info.MinImageCount = g_MinImageCount;
init_info.ImageCount = wd->ImageCount;
init_info.CheckVkResultFn = check_vk_result;
ImGui_ImplVulkan_Init(&init_info, wd->RenderPass);
The first function ImGui_ImplGlfw_InitForVulkan comes from imgui_impl_glfw.cpp. It lets Dear ImGui interact with GLFW in a non intrusive way. For example, Dear ImGui will have access to the keyboard and mouse events but will still run the user registered callbacks afterwards. This way we don’t have to care about handling GUI related inputs and we can still use the mouse position for things like camera control. To let the library help you with that, you will need to provide it with the GLFW window mentioned earlier.
Next up is the ImGui_ImplVulkan_InitInfo structure used by the ImGui_ImplVulkan_Init function. As you can see, they both follow the pattern ImGui_ImplVulkan_XXX and not ImGui_ImplVulkanH_XXX. This means we are encouraged to use them. We can already see that this structure is a big bridge between your engine and Dear ImGui. A lot of Vulkan internals are exposed here and we’re going to figure out where they are in our engine.
Vulkan instance and devices
The first variable is g_Instance, this is the VkInstance you had to create through the vkCreateInstance call. It’s one of the lower level bricks of Vulkan. It holds the extensions required to run your program and the validation layers as well.
Then comes g_PhysicalDevice and g_Device. Those should be pretty self explanatory, they are the VkPhysicalDevice and VkDevice you created in your engine.
Queue
The next bit can be a bit confusing. The structure needs a QueueFamily and a Queue. If you’re familiar with Vulkan, you know that most operations are done through command buffers that are submitted to a queue. A queue comes from a queue family that allows a limited subset of operations. For example, a family could only allow compute operations or transfer operations. You might be using several queues yourself, so which one is the right one? The most likely one is the graphics queue as Dear ImGui will only be drawing stuff. If you quickly look through the code you’ll find confirmation that we’re indeed looking for a graphics queue and the related family.
for (uint32_t i = 0; i < count; i++){
    if (queues[i].queueFlags & VK_QUEUE_GRAPHICS_BIT)
    {
        g_QueueFamily = i;
        break;
    }
}
Note: I couldn’t find any use for the graphics family in Dear ImGui’s code so I tried putting a random number in there and it worked fine.
Pipeline cache
After the queue comes the PipelineCache. I haven’t used those but I suppose this is an object that holds previously created pipelines such as a graphics pipeline. If you have one, good for you. If you don’t, VK_NULL_HANDLE will work just fine. As far as I can tell, it’s only used when creating Dear ImGui’s graphics pipeline.
Descriptor pool
The DescriptorPool is another interesting element. Again, you probably already have one. If you’re using image samplers or uniform buffers you have allocated their descriptors from a pool. However, looking at the code you can see that g_DescriptorPool is created using the following pool_sizes.
VkDescriptorPoolSize pool_sizes[] =
{
    { VK_DESCRIPTOR_TYPE_SAMPLER, 1000 },
    { VK_DESCRIPTOR_TYPE_COMBINED_IMAGE_SAMPLER, 1000 },
    { VK_DESCRIPTOR_TYPE_SAMPLED_IMAGE, 1000 },
    { VK_DESCRIPTOR_TYPE_STORAGE_IMAGE, 1000 },
    { VK_DESCRIPTOR_TYPE_UNIFORM_TEXEL_BUFFER, 1000 },
    { VK_DESCRIPTOR_TYPE_STORAGE_TEXEL_BUFFER, 1000 },
    { VK_DESCRIPTOR_TYPE_UNIFORM_BUFFER, 1000 },
    { VK_DESCRIPTOR_TYPE_STORAGE_BUFFER, 1000 },
    { VK_DESCRIPTOR_TYPE_UNIFORM_BUFFER_DYNAMIC, 1000 },
    { VK_DESCRIPTOR_TYPE_STORAGE_BUFFER_DYNAMIC, 1000 },
    { VK_DESCRIPTOR_TYPE_INPUT_ATTACHMENT, 1000 }
};
There are A LOT of things in there. Your pool most likely doesn’t have all this. Now there are two solutions, you can either extend your own pool to give it such capacity, or you can create a special one for Dear ImGui. I’m not sure what the implications of having separated pools are but in order to keep everything well separated I decided to create a custom pool for Dear ImGui using the code provided at the end of the function SetupVulkan in main.cpp.
Memory allocator
The Allocator field can be used to pass a specific memory allocator to the Vulkan functions called by Dear ImGui. You can pass nullptr if you don’t have any.
Image count
MinImageCount and ImageCount are related to the swapchain images. These are not Dear ImGui specific properties and your engine should expose them. ImageCount lets Dear ImGui know how many framebuffers and resources in general it should allocate. MinImageCount is not actually used even though there is a check at init time that its value is greater than 1.
Error handling
CheckVkResultFn is a function that is called to verify that some Vulkan operations went well. For example, all the vkCreate or vkAllocate functions will return a status code which should be VK_SUCCESS. If not, something went wrong. It’s good practice to check and Dear ImGui allows you to pass your own error handling logic.
Final call
And finally we’re initializing our VulkanImpl by calling ImGui_ImplVulkan_Init on the structure we just filled and a render pass. As you can expect, this should be a specific render pass dedicated to Dear ImGui. So where did that wd->RenderPass come from? Well earlier we skipped a few functions used to initialize Vulkan and it turns out they create this render pass as well. We’ll have to create our own.
Render pass
To create this render pass we first need to create a VkAttachmentDescription. Let’s get rid of the boring fields first: we don’t need any stencil so we don’t care about its operators and the number of samples should probably be 1. Dear ImGui’s output looks fine without MSAA. The format used depends on your swapchain and you should be able to find the relevant VkFormat somewhere in your code. It is usually extracted from the SwapChainSupportDetails structure returned by the function querySwapChainSupport.
Ok, so two of the most relevant parts here are loadOp and initialLayout. The first one should be VK_ATTACHMENT_LOAD_OP_LOAD because you want your GUI to be drawn over your main rendering. This tells Vulkan you don’t want to clear the content of the framebuffer but you want to draw over it instead. Since we’re going to draw some stuff, we also want initialLayout to be set to VK_IMAGE_LAYOUT_COLOR_ATTACHMENT_OPTIMAL for optimal performance. And because this render pass is the last one, we want finalLayout to be set to VK_IMAGE_LAYOUT_PRESENT_SRC_KHR. This will automatically transition our attachment to the right layout for presentation.
VkAttachmentDescription attachment = {};
attachment.format = swapChain.imagesFormat;
attachment.samples = VK_SAMPLE_COUNT_1_BIT;
attachment.loadOp = VK_ATTACHMENT_LOAD_OP_LOAD;
attachment.storeOp = VK_ATTACHMENT_STORE_OP_STORE;
attachment.stencilLoadOp = VK_ATTACHMENT_LOAD_OP_DONT_CARE;
attachment.stencilStoreOp = VK_ATTACHMENT_STORE_OP_DONT_CARE;
attachment.initialLayout = VK_IMAGE_LAYOUT_COLOR_ATTACHMENT_OPTIMAL;
attachment.finalLayout = VK_IMAGE_LAYOUT_PRESENT_SRC_KHR;
Now that we have this VkAttachmentDescription we can create the actual color VkAttachmentReference that our render pass needs. As we described above, the layout we’re using to draw is VK_IMAGE_LAYOUT_COLOR_ATTACHMENT_OPTIMAL.
VkAttachmentReference color_attachment = {};
color_attachment.attachment = 0;
color_attachment.layout = VK_IMAGE_LAYOUT_COLOR_ATTACHMENT_OPTIMAL;
We can now create a subpass for our render pass using the previously created attachment. It is obviously a graphics subpass.
VkSubpassDescription subpass = {};
subpass.pipelineBindPoint = VK_PIPELINE_BIND_POINT_GRAPHICS;
subpass.colorAttachmentCount = 1;
subpass.pColorAttachments = &color_attachment;
Now here comes the tricky part. We have two render passes that we need to synchronize. As far as I can tell, there is no implicit synchronization in Vulkan regarding different render passes. There is a wide range of synchronization primitives to choose from in Vulkan but we can quickly eliminate some of them. Fences are used to synchronize the CPU and the GPU, this is way overkill. Semaphores are used to synchronize events across multiples queues and / or hardware. It is not relevant here either. I’m not too familiar with events, it seems they could do the trick but we won’t be using them here.
This leaves us with pipeline barriers and external subpass dependencies. As explained in this great overview of Vulkan synchronization, they are both pretty similar. A subpass dependency is basically the driver inserting a pipeline barrier for you. I chose this method because it is theoretically more optimized than doing it by hand. Also, I looked at imgui_impl_vulkan.cpp and that’s how it’s done in there, ahum.
Ok so our srcSubpass must be VK_SUBPASS_EXTERNAL to create a dependency outside the current render pass. We can refer to our first and only subpass in dstSubpass by its index 0. Now we need to state what we’re waiting for. Before drawing our GUI, we want our geometry to be already rendered. That means we want the pixels to be already written to the framebuffer. Fortunately, there is a stage called VK_PIPELINE_STAGE_COLOR_ATTACHMENT_OUTPUT_BIT for that and we can set our srcStageMask to it. We can also set our dstStageMask to this same value because our GUI will also be drawn to the same target. We’re basically waiting for pixels to be written before we can write pixels ourselves.
As for the access masks, I’m not sure I understand exactly how they work. If we look at imgui_impl_vulkan.cpp, we can see that srcAccessMask is set to 0 and dstAccessMask is set to VK_ACCESS_COLOR_ATTACHMENT_WRITE_BIT. I would argue the srcAccessMask should use the VK_ACCESS_COLOR_ATTACHMENT_WRITE_BIT flag as well. We are waiting for writes to be done with before we can write ourselves. I don’t have the answer here, do as you wish. Both work on my computer.
VkSubpassDependency dependency = {};
dependency.srcSubpass = VK_SUBPASS_EXTERNAL;
dependency.dstSubpass = 0;
dependency.srcStageMask = VK_PIPELINE_STAGE_COLOR_ATTACHMENT_OUTPUT_BIT;
dependency.dstStageMask = VK_PIPELINE_STAGE_COLOR_ATTACHMENT_OUTPUT_BIT;
dependency.srcAccessMask = 0;  // or VK_ACCESS_COLOR_ATTACHMENT_WRITE_BIT;
dependency.dstAccessMask = VK_ACCESS_COLOR_ATTACHMENT_WRITE_BIT;
We are now ready to finally create the renderpass by putting together everything we just created. For the sake of completeness, here is the code to finalize the creation of the render pass.
VkRenderPassCreateInfo info = {};
info.sType = VK_STRUCTURE_TYPE_RENDER_PASS_CREATE_INFO;
info.attachmentCount = 1;
info.pAttachments = &attachment;
info.subpassCount = 1;
info.pSubpasses = &subpass;
info.dependencyCount = 1;
info.pDependencies = &dependency;
if (vkCreateRenderPass(device, &info, nullptr, &imGuiRenderPass) != VK_SUCCESS) {
    throw std::runtime_error("Could not create Dear ImGui's render pass");
}
By the way, don’t forget to change your penultimate render pass as well. Let’s say you had only one pass that did the main rendering. You should set its finalLayout field to VK_IMAGE_LAYOUT_COLOR_ATTACHMENT_OPTIMAL since it’s not presenting anymore.
Uploading fonts to the GPU
The next bit as the comment suggests is about uploading fonts to the GPU. It might look complicated at first but it all boils down to a single line specific to Dear ImGui. I haven’t investigated what it does exactly but there are lots of comments around it pointing in the right direction if you are interested.
ImGui_ImplVulkan_CreateFontsTexture(command_buffer);
The code around it handles the command buffer creation and submission. You might already have functions ready for one time usage command buffers (if you have followed Alexander Overvoorde’s tutorial for example). The code simplifies to 3 lines.
VkCommandBuffer command_buffer = beginSingleTimeCommands();
ImGui_ImplVulkan_CreateFontsTexture(command_buffer);
endSingleTimeCommands(command_buffer);
If you don’t have anything like that ready, it’s ok. You can simply reuse the code provided as is. The variable g_Device is the logical device you created in your engine and g_Queue is the graphics queue you queried as well. You might be wondering what you should be using for the VkCommandBuffer and VkCommandPool. Well, we’ll reuse the command buffers and command pools that allow us to submit the Dear ImGui related commands to the GPU. We’ll be getting to those in a moment.
The main loop
Ok so as far as we can tell, we’re done with initialization. You can tell because the main loop is starting. We’re starting an infinite loop that will only stop if GLFW tells us the user asked to close the window. Again, you should already have this up and running somewhere.
while (!glfwWindowShouldClose(window)){
    // Your amazing Vulkan stuff
}
The beginning of this function is pretty standard: a call to glfwPollEvents to detect user inputs and some code to recreate the swapchain if needed. You should already have both of those to handle user inputs and events such as the window being resized. The only thing here relevant to DearImGui is that upon recreating the swapchain, the minimum amount of image views might have changed. You have to tell Dear ImGui about it by calling ImGui_ImplVulkan_SetMinImageCount.
if (g_SwapChainRebuild)
{
    g_SwapChainRebuild = false;
    ImGui_ImplVulkan_SetMinImageCount(g_MinImageCount);
    ImGui_ImplVulkanH_CreateWindow(g_Instance, g_PhysicalDevice, g_Device, &g_MainWindowData,
            g_QueueFamily, g_Allocator, g_SwapChainResizeWidth, g_SwapChainResizeHeight, g_MinImageCount);
    g_MainWindowData.FrameIndex = 0;
}
Describing the UI
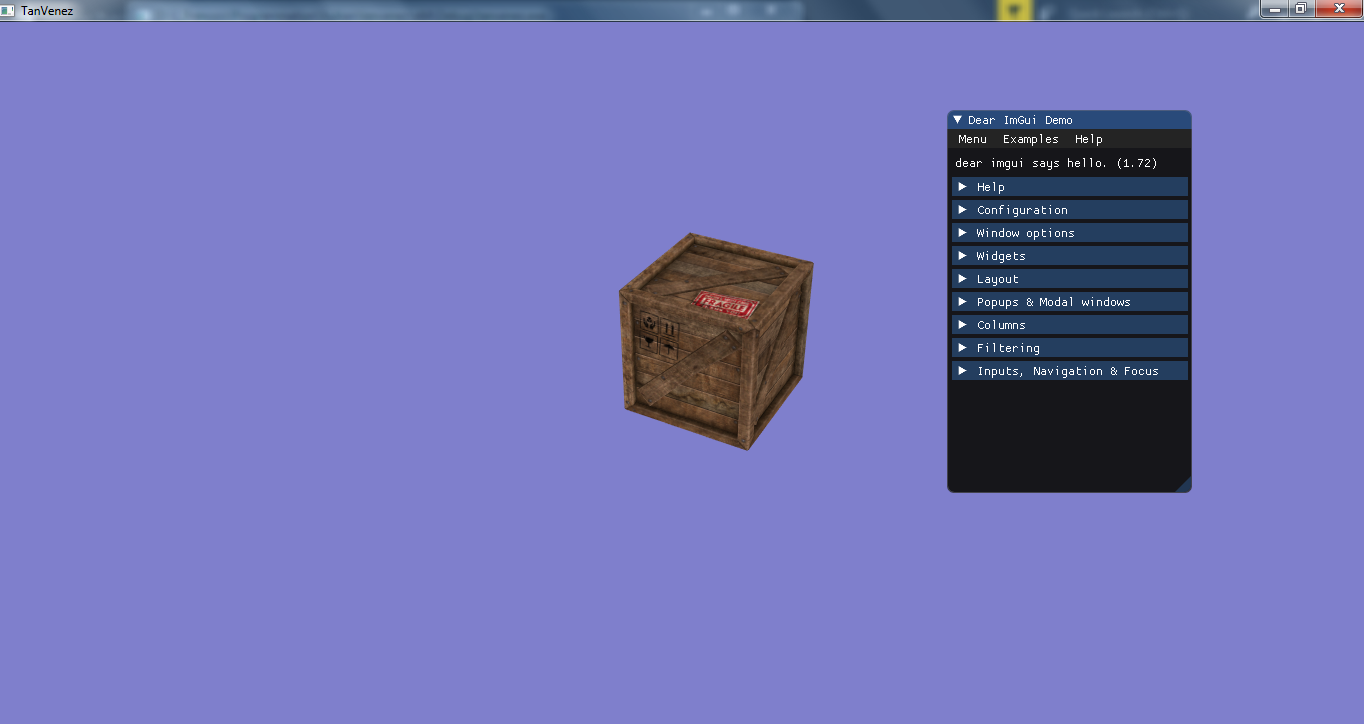
The next part is where you can actually code your UI. This is not what this article is about so we’ll just use the demo window. It also helps getting a higher view of what’s going on.
ImGui_ImplVulkan_NewFrame();
ImGui_ImplGlfw_NewFrame();
ImGui::NewFrame();
ImGui::ShowDemoWindow();
ImGui::Render();
First we need to create a new frame, then we describe our UI and finally we ask Dear ImGui to render it. It’s pretty straight forward. You might be wondering why creating a new frame takes 3 different calls and that’s a legitimately good question. The implementation of ImGui_ImplVulkan_NewFrame is actually empty. I suppose this is just a precaution from the author in case some day there is some Vulkan specific code to add in here. The call to ImGui_ImplGlfw_NewFrame on the other hand makes sense. It is used to handle the user inputs, the screen resize etc. Finally, we need to initialize an actual ImGuiFrame.
Now for the last three lines of our main loop. The first one is specific to the example and is irrelevant. The next two on the other hand are the ones I’m interested in. You should actually have some version of those yourself. This is where you acquire an imageview from the swapchain, maybe record some command buffers and finally submit them. We will still need to modify those functions slightly to integrate our new rendering operations.
memcpy(&wd->ClearValue.color.float32[0], &clear_color, 4 * sizeof(float));
FrameRender(wd);
FramePresent(wd);
Rendering the UI - Part 1
Let’s look at FrameRender first. The first few lines are about acquiring a new image from the swapchain and synchronizing the CPU with GPU using fences. This last operation ensures that we’re not submitting more frames to the GPU than we have available. This is not specific to Dear ImGui, and you should have the same kind of construct in your code.
VkSemaphore image_acquired_semaphore  = wd->FrameSemaphores[wd->SemaphoreIndex].ImageAcquiredSemaphore;
VkSemaphore render_complete_semaphore = wd->FrameSemaphores[wd->SemaphoreIndex].RenderCompleteSemaphore;
err = vkAcquireNextImageKHR(g_Device, wd->Swapchain, UINT64_MAX, image_acquired_semaphore, VK_NULL_HANDLE, &wd->FrameIndex);
check_vk_result(err);

ImGui_ImplVulkanH_Frame* fd = &wd->Frames[wd->FrameIndex];
{
    err = vkWaitForFences(g_Device, 1, &fd->Fence, VK_TRUE, UINT64_MAX);    // wait indefinitely instead of periodically checking
    check_vk_result(err);

    err = vkResetFences(g_Device, 1, &fd->Fence);
    check_vk_result(err);
}
The next part is getting more interesting. We’re resetting a command pool and starting to record commands into a command buffer. So why would we be doing this? Well, our UI can have multiple states, windows will come and go, buttons will be added and so on. We cannot record our buffers once and for all. We need to record them every time the content changes. The quick and easy solution is to do this every frame. I suppose one could find a way to hash the UI and rebuild command buffers only when necessary but we won’t be doing this right now.
{
    err = vkResetCommandPool(g_Device, fd->CommandPool, 0);
    check_vk_result(err);
    VkCommandBufferBeginInfo info = {};
    info.sType = VK_STRUCTURE_TYPE_COMMAND_BUFFER_BEGIN_INFO;
    info.flags |= VK_COMMAND_BUFFER_USAGE_ONE_TIME_SUBMIT_BIT;
    err = vkBeginCommandBuffer(fd->CommandBuffer, &info);
    check_vk_result(err);
}
More initialization
We haven’t really setup any command pools or command buffers in the initialization part so we’ll have to remedy this. The first thing we need to know is how many of those we’ll need. A quick look further down the code should tell you that a single command buffer will be enough to draw. Same goes for the command pool. However and as always in Vulkan, we might be preparing multiple frames in advance. That means we cannot use the same command buffer for multiple frames. We’ll have to create as many command buffers and command pools as we have frames.
One could think a single pool would be enough to hold all the command buffers but vkResetCommandPool will reset all command buffers, including the ones that are still in use. For this reason, we need several of them. The good news is the validation layers will catch you (well, they caught me) red handed if you try.
imGuiCommandPools.resize(imageViews.size());
imGuiCommandBuffers.resize(imageViews.size());
for (size_t i = 0; i < imageViews.size(); i++) {
    createCommandPool(&imGuiCommandPools[i], VK_COMMAND_POOL_CREATE_RESET_COMMAND_BUFFER_BIT);
    createCommandBuffers(&imGuiCommandBuffers[i], 1, imGuiCommandPools[i]);
}
Let’s look at the command pool first. Our createCommandPool function only takes two arguments, the command pool to create and the flags we want to set. In this case we’re using VK_COMMAND_POOL_CREATE_RESET_COMMAND_BUFFER_BIT. Why do we use this flag? First because I looked at imgui_impl_vulkan.cpp and saw it was set there. And second because we’re calling vkResetCommandPool every frame. Here is what the specification has to say about that.
VK_COMMAND_POOL_CREATE_RESET_COMMAND_BUFFER_BIT allows any command buffer allocated from a pool to be individually reset to the initial state; either by calling vkResetCommandBuffer, or via the implicit reset when calling vkBeginCommandBuffer.
So the spec is basically saying that calling vkResetCommandPool is useless, right? Well, I would assume so. I tried it on my computer and it worked, no complain from the validation layers either. I guess it’s up to you to decide how explicit you want your code to be. But this got me thinking, if I don’t need to reset the entire pool, then I don’t need to have multiple pools either. I tried setting all command buffers from the same pool and removing the call to vkResetCommandPool and everything seems fine, validation layer wise or other. Here is what the new code looks like.
createCommandPool(&imGuiCommandPool, VK_COMMAND_POOL_CREATE_RESET_COMMAND_BUFFER_BIT);
imGuiCommandBuffers.resize(imageViews.size());
createCommandBuffers(imGuiCommandBuffers.data(), static_cast<uint32_t>(imGuiCommandBuffers.size()), imGuiCommandPool;
On the other hand, not setting the VK_COMMAND_POOL_CREATE_RESET_COMMAND_BUFFER_BIT flag at all will get you in a lot of trouble!
Validation layer returned an error:
Call to vkBeginCommandBuffer() on command buffer (0x537ba90) attempts to implicitly reset cmdBuffer created from command pool (0x3c) that does NOT have the VK_COMMAND_POOL_CREATE_RESET_COMMAND_BUFFER_BIT bit set. The Vulkan spec states:
If commandBuffer was allocated from a VkCommandPool which did not have the VK_COMMA ND_POOL_CREATE_RESET_COMMAND_BUFFER_BIT flag set, commandBuffer must be in the initial state. (https://www.khronos.org/registry/vulkan/specs/1.1-extensions/html/vkspec.html#VUID-vkBeginCommandBuffer-commandBuffer-00050)
If you need it, here’s the complete code of the createCommandPool function. There is nothing fancy about it.
void createCommandPool(VkCommandPool* commandPool, VkCommandPoolCreateFlags flags) {
    VkCommandPoolCreateInfo commandPoolCreateInfo = {};
    commandPoolCreateInfo.sType = VK_STRUCTURE_TYPE_COMMAND_POOL_CREATE_INFO;
    commandPoolCreateInfo.queueFamilyIndex = graphicsFamilyIndex;
    commandPoolCreateInfo.flags = flags;

    if (vkCreateCommandPool(device, &commandPoolCreateInfo, nullptr, commandPool) != VK_SUCCESS) {
        throw std::runtime_error("Could not create graphics command pool");
    }
}
Finally we can create our command buffer. There is nothing specific about this, we just pass the associated command pool and allocate the command buffer. Note that vkAllocateCommandBuffers can allocate several buffers at the same time but only from the same pool. This is why we had to call createCommandBuffers inside the loop in the first version and we can now call it a single time to allocate all command buffers at once. Again, here is the full code if you need it.
void createCommandBuffers(VkCommandBuffer* commandBuffer, uint32_t commandBufferCount, VkCommandPool &commandPool) {
    VkCommandBufferAllocateInfo commandBufferAllocateInfo = {};
    commandBufferAllocateInfo.sType = VK_STRUCTURE_TYPE_COMMAND_BUFFER_ALLOCATE_INFO;
    commandBufferAllocateInfo.level = VK_COMMAND_BUFFER_LEVEL_PRIMARY;
    commandBufferAllocateInfo.commandPool = commandPool;
    commandBufferAllocateInfo.commandBufferCount = commandBufferCount;
    vkAllocateCommandBuffers(device, &commandBufferAllocateInfo, commandBuffer);
}
Now is a good time to go back to the font uploading code if you chose to keep the code provided by main.cpp. You can use our new command pool and any of the new command buffers to upload the fonts to the GPU.
Rendering the UI - Part 2
Back to our FrameRender function. The next bit is about starting a render pass. We can see that we’ll need a render pass. This is the one we specifically created for DearImGui here. We also see that we’ll need a framebuffer. The thing is we haven’t created any so we’ll need to do some more initialization.
The width and height parameters can be found in the VkExtent2D you used to create your swapchain and the clearValueCount and pClearValues define what color you want to use to clear the framebuffer. Finally, we start the renderpass using the current frame’s command buffer and the info we just built.
{
    VkRenderPassBeginInfo info = {};
    info.sType = VK_STRUCTURE_TYPE_RENDER_PASS_BEGIN_INFO;
    info.renderPass = wd->RenderPass;
    info.framebuffer = fd->Framebuffer;
    info.renderArea.extent.width = wd->Width;
    info.renderArea.extent.height = wd->Height;
    info.clearValueCount = 1;
    info.pClearValues = &wd->ClearValue;
    vkCmdBeginRenderPass(fd->CommandBuffer, &info, VK_SUBPASS_CONTENTS_INLINE);
}
I haven’t insisted very much on the fact that for each imageView from the swapchain we use specific resources. This should be very clear in your mind. This is why we have an array of command buffers and we’ll soon be creating an array of framebuffers. The example provided by Dear ImGui kind of hides this complexity behind its fd object. In the above snippet, you should understand fd->XXX as imageViewResources[imageViewId]->XXX. The index imageViewId is provided by vkAcquireNextImageKHR.
More initialization - Part 2
So what should we use as our framebuffer? You probably already have an array of framebuffers lying around, one for each frame in flight. So why not use them? You can try but the validation layers are very likely to yell at you, again. They will first tell you that you’re trying to present an image that is in the wrong layout, then that the renderpass is incompatible with the framebuffer because there is an incompatible number of attachments and so on. In short, it’s a bad idea. They’re not compatible. We have once again (and I promise, it’s the last time) forgotten to initialize something.
So what is wrong with our main rendering framebuffers? Well first they might have too many attachments. Dear ImGui doesn’t require a depth buffer for example or if you’re using MSAA, Dear ImGui doesn’t require a resolve buffer either. What do they need then? The easiest is to ctrl-f your way through imgui_impl_vulkan.cpp to find a call to vkCreateFramebuffer. Here is what I found.
{
    VkImageView attachment[1];
    VkFramebufferCreateInfo info = {};
    info.sType = VK_STRUCTURE_TYPE_FRAMEBUFFER_CREATE_INFO;
    info.renderPass = wd->RenderPass;
    info.attachmentCount = 1;
    info.pAttachments = attachment;
    info.width = wd->Width;
    info.height = wd->Height;
    info.layers = 1;
    for (uint32_t i = 0; i < wd->ImageCount; i++)
    {
        ImGui_ImplVulkanH_Frame* fd = &wd->Frames[i];
        attachment[0] = fd->BackbufferView;
        err = vkCreateFramebuffer(device, &info, allocator, &fd->Framebuffer);
        check_vk_result(err);
    }
}
As I mentioned, we only need one attachment, the one we will draw to. The renderpass, width and height are exactly the same as the ones we provided here and layers is 1 because our imageViews are single images and not arrays.
Now for the actual framebuffer creation, we’re again creating as many as we have imageViews. The naming in here is not very explicit to me but what’s going on is actually pretty simple. We just need to create a framebuffer for each imageView and reference it in the attachment. That’s all that is going on in the for loop. The imageView is wd->Frames[i]->BackbufferView in Dear ImGui’s code. Again, you already have those somewhere otherwise you would not able to draw or present anything.
Rendering the UI - Part 3
So, what did we do? We created our GUI specific framebuffers and we used them to begin a render pass inside the command buffer we’re currently recording. The next function call is the one doing all the work. This is Dear ImGui adding all its draw calls to our render pass.
// Record Imgui Draw Data and draw funcs into command buffer
ImGui_ImplVulkan_RenderDrawData(ImGui::GetDrawData(), fd->CommandBuffer);
After all the calls were recorded, we can end our render pass and our command buffer. In the current version of the example, the call to end the command buffer is a little further down the code but I find it more readable to put it right after we end our render pass. It doesn’t change the behavior at all.
// Submit command buffer
vkCmdEndRenderPass(fd->CommandBuffer);
err = vkEndCommandBuffer(fd->CommandBuffer);
check_vk_result(err);
The next part in the example is submitting the command buffer to the GPU. This code is a bit specific to your engine and depends on how you setup synchronization between frames. The good thing is you already have this code. You basically submit commands through a call to vkQueueSubmit with a VkSubmitInfo as an argument. This submit info structure has a field pCommandBuffers in which you put a single command buffer or an array of them. The only thing you have to do is to add the GUI related command buffer to this array. If you only had one command buffer before, just create an array with those two command buffers on the fly. From a top level, it should look something like this.
std::array<VkCommandBuffer, 2> submitCommandBuffers =
    { commandBuffers[imageIndex], imGuiCommandBuffers[imageIndex] };
VkSubmitInfo submitInfo = {};
submitInfo.sType = VK_STRUCTURE_TYPE_SUBMIT_INFO;
(...)
submitInfo.commandBufferCount = static_cast<uint32_t>(submitCommandBuffers.size());
submitInfo.pCommandBuffers = submitCommandBuffers.data();
if (vkQueueSubmit(graphicsQueue, 1, &submitInfo, inFlightFences[currentFrame]) != VK_SUCCESS) {
    throw std::runtime_error("Could not submit commands to the graphics queue");
}
Presenting the frame
And we’re done with FrameRender! We’re left with FramePresent and then we’ll be done with the main loop. And you know what? There is nothing specific to Dear ImGui about it. That’s right, you already have this code once again. So yeah, we’re done. Go run that program and hope it works! Did it? Good! If not, do not hesitate to leave a comment and we’ll see what we can do about it!
Also, do not forget to take a look at the console, the validation layers will complain that you didn’t do the right thing and cleaned after yourself. We created many resources for Dear ImGui and never took time to clean those. Do not forget either that on swapchain recreation, the Dear ImGui renderpass, command pools, command buffers and framebuffers must be destroyed and then recreated!
// Resources to destroy on swapchain recreation
for (auto framebuffer : imGuiFramebuffers) {
    vkDestroyFramebuffer(device, framebuffer, nullptr);
}

vkDestroyRenderPass(device, imGuiRenderPass, nullptr);

vkFreeCommandBuffers(device, imGuiCommandPool, static_cast<uint32_t>(imGuiCommandBuffers.size()), imGuiCommandBuffers.data());
vkDestroyCommandPool(device, imGuiCommandPool, nullptr);

// Resources to destroy when the program ends
ImGui_ImplVulkan_Shutdown();
ImGui_ImplGlfw_Shutdown();
ImGui::DestroyContext();
vkDestroyDescriptorPool(device, imguiDescriptorPool, nullptr);
Final words
Wow, we finally made it through all this. You should now be able to render some geometry and add some GUI over it. Now go make something cool with it and send it to me on Twitter @frguthmann. You can also leave a comment below, Disqus has a guest mode. Thank you for reading and do not hesitate to tell me if something is wrong or unclear. Any feedback is welcome :).